
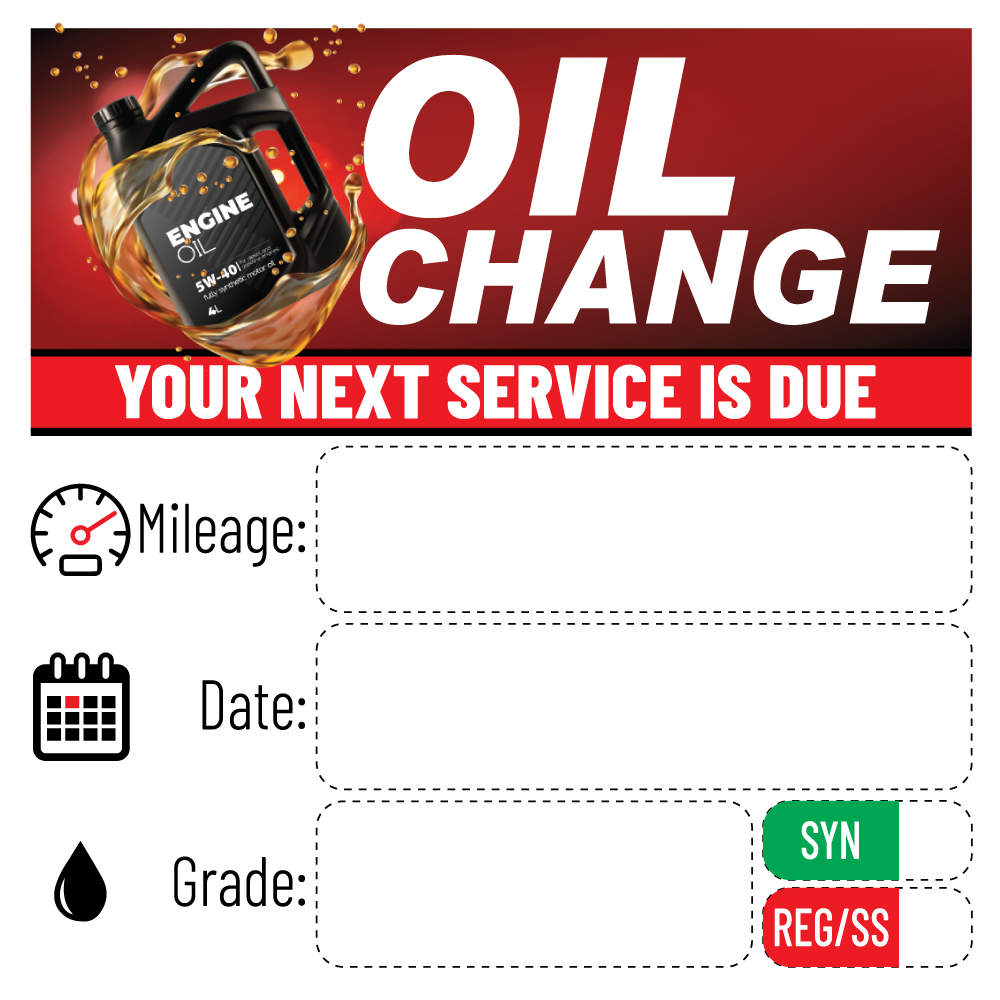
A completed oil change is only one part of the customer handoff. Your team also needs to communicate when the next service is due. If every technician or advisor uses a different method, important information can be missed.
One employee may mention the next service verbally. Another may write a number on the invoice. Someone else may apply a sticker without completing the date field.
For smaller Canadian automotive shops, a generic oil change sticker provides a simple way to standardize that final step. It gives your team a consistent place to record the next service information and gives the customer a visible reminder after leaving the shop.
This guide explains how to complete, place, and check a generic oil change sticker using kilometres and KM-based service information.
Why Standardized Oil Change Handoffs Matter
A verbal reminder is easy to forget. A clear, completed sticker gives the customer something they can see every time they enter the vehicle.
A consistent handoff can help your shop:
- Reduce confusion between the technician, advisor, and customer
- Display the next recommended service in kilometres
- Give low-mileage drivers a time-based reminder
- Make the final quality-control process easier to verify
- Support repeat maintenance visits
- Keep every employee using the same communication method
- Present a more organized and professional customer experience
Generic stickers are especially useful for smaller shops that do not need a fully customized design but still want every oil service handled consistently.
They are also practical as a backup supply when a shop is waiting for custom materials, testing a new workflow, or managing a temporary increase in service volume.
What a Generic Oil Change Sticker Should Record
A useful sticker should make the next service recommendation easy to understand. The exact fields may vary, but your team should normally complete:
- Next service kilometres
- Next service date
- Oil grade or viscosity
- Oil type, such as synthetic or regular/semi-synthetic
- Technician or advisor initials, if your shop uses an internal check system
The sticker should support the vehicle’s actual maintenance recommendation. Do not use one automatic interval for every vehicle without checking the service history, oil type, manufacturer guidance, and driving conditions.
For example:
- Current odometer: 98,500 km
- Recommended interval: 8,000 km or six months
- Sticker mileage: 106,500 km
- Sticker date: The appropriate month or full date based on your shop’s policy
If the vehicle reaches the mileage first, the customer should return based on kilometres. If the customer drives very little, the date provides an additional reminder.
Always use KM or kilometres for Canadian customers. Do not write miles on a Canadian service reminder unless the vehicle and customer specifically require a different measurement system.

How to Complete the Sticker
Use the same sequence every time. A repeatable process reduces omissions and makes training easier.
1. Confirm the current odometer
Start with the vehicle’s current odometer reading in kilometres. Compare it with the completed work order before calculating the next service point.
Do not rely on memory or an earlier estimate from the appointment booking. Use the reading captured during the actual service.
2. Confirm the service interval
Check the applicable recommendation for the vehicle and the oil installed. Consider:
- Manufacturer guidance
- Oil type and viscosity
- Vehicle age
- Driving conditions
- Short-trip or heavy-traffic use
- Towing or commercial use
- The customer’s existing maintenance history
If your shop follows a standard interval for a specific service, make sure it is appropriate for that vehicle before writing it on the sticker.
3. Calculate the next KM value
Add the selected interval to the current odometer reading.
For example:
112,400 km + 8,000 km = 120,400 km
Write the complete number clearly. Avoid abbreviations that could be misread, such as “120.4” or “120K,” unless your shop has formally approved that format.
4. Complete the date field
Add a date or month that matches your shop’s process. A full date is the clearest option, but a month and year may be suitable when the recommendation is time-based.
Use one date format across your entire team. For example:
- September 2026
- 2026-09-08
- Sep. 8, 2026
The important point is consistency. Different formats can create avoidable confusion.
5. Mark the oil grade
Complete the oil grade or viscosity field while the service information is still available on the work order or invoice. If the sticker includes oil-type options, mark the correct option clearly.
The customer should not have to guess whether the vehicle received synthetic or regular/semi-synthetic oil.
6. Use a legible permanent marker
Write with a dark, fine-tip permanent marker that produces clear characters. Do not complete the sticker with an oily glove or a marker that smears easily.
Leave enough space between numbers. A customer should be able to distinguish:
- 106,500 from 108,500
- 0 from 6
- 1 from 7
- September from October
If the writing is unclear, replace the sticker before the vehicle leaves.
Before and After: A Standardized Handoff
The difference between an inconsistent note and a completed generic sticker is small in terms of time, but significant in terms of clarity.

Before: Inconsistent verbal handoff
- Technician tells the advisor: “They should come back in a while.”
- No exact KM value is written
- The date is missing
- The customer may not remember the recommendation
- The advisor may repeat incomplete information
- There is no visible reminder after the vehicle leaves
After: Standardized sticker handoff
- Current odometer is confirmed
- Next service is calculated in KM
- Date and oil grade are written
- Sticker is checked against the work order
- Sticker is placed in the shop’s standard location
- Advisor explains the information during vehicle pickup
The sticker does not replace a proper explanation. It supports it.
A concise checkout statement is enough:
“Your next oil service is recommended at 120,400 km or by March 2027, whichever comes first. We have written that information on the reminder sticker.”
Where to Place the Sticker
For this standardized process, use an approximately 2 x 2 inch sticker.
Apply it to:
- The inside face of the windshield
- The top-left corner from the driver’s perspective
- A clean, dry area that does not interfere with visibility
- A position where the information is readable from inside the cabin
Do not place the reminder on the steering wheel. Do not apply it over cameras, sensors, inspection decals, registration information, or other factory equipment.
Before application:
- Clean the glass with a suitable lint-free cloth.
- Make sure the area is dry.
- Remove dust, fingerprints, moisture, and dashboard dressing residue.
- Apply the sticker smoothly without repeatedly repositioning it.
- Press across the full surface, including the edges.
Your shop may need to adjust the exact position slightly for different windshield shapes or existing vehicle equipment. The key is to train the team to use the same general location and to keep the sticker unobtrusive.

Why White Ultra-Low-Tack Vinyl Is a Practical Choice
For a customer-facing windshield reminder, the material must balance durability with clean removal.
StickerPlanet.ca uses white ultra-low-tack vinyl for applications where the sticker needs to remain visible through the service interval and lift away cleanly when replaced. The white face provides a strong writing surface and helps handwritten KM and date information remain readable.
Typical benefits include:
- Clean white background for high contrast
- Approximately 3 mil removable vinyl construction
- Better resistance to moisture than ordinary paper
- Reliable performance through Canadian temperature changes
- Clean removal when properly applied
- A professional appearance for customer handoffs
StickerPlanet.ca uses eco-solvent inks for all stickers. These are not UV inks. Eco-solvent printing helps produce vivid, durable graphics while maintaining the clear red, black, and white visual treatment used for automotive reminder products.
The materials used for StickerPlanet.ca products are selected for professional automotive applications, with premium North American materials and Canadian production expertise behind the finished order.
Build a Final Handoff Check
A generic sticker works best when it becomes part of the final service checklist.
Before releasing the vehicle, the technician or advisor should confirm:
- Is the current odometer recorded in KM?
- Is the next service KM value correct?
- Is the date complete and readable?
- Is the oil grade marked?
- Does the sticker match the work order?
- Is the sticker approximately 2 x 2 inches?
- Is it applied to the inside top-left windshield area?
- Is it readable from inside the vehicle?
- Is it clear of the driver’s primary view and vehicle equipment?
- Has the advisor explained the recommendation?
Assign responsibility for this check. If everyone assumes someone else will complete it, the process will fail during busy periods.
Keep stickers, markers, and cleaning cloths near the finalization area. Make the correct process the easiest process for your team to follow.
No-Cost Benefits of a Consistent Process
Standardizing generic oil change stickers does not require a complicated software system or a major operational change.
Your shop can gain several no-cost benefits by using the same method every time:
- No additional customer handoff paperwork
- No need for a custom design to start
- No complicated training process
- No extra customer explanation beyond a few seconds
- No hidden costs in the sticker communication process
- No uncertainty about where to record the next service information
StickerPlanet.ca also provides straightforward ordering support for automotive businesses, with no hidden costs, no rush charges, and no artwork setup fees where applicable. Orders are produced in Canada using professional-grade materials and can be shipped with tracking and insurance.
Start With a Simple Standard
A generic oil change sticker does not need to be complicated. It needs to be accurate, readable, correctly placed, and used every time.
For a small Canadian shop, the basic standard is:
- Record the current odometer in KM.
- Confirm the correct service interval.
- Write the next KM value and date.
- Mark the oil grade.
- Check the sticker against the work order.
- Apply the approximately 2 x 2 inch sticker inside the windshield’s top-left corner from the driver’s perspective.
- Explain the recommendation before returning the keys.
That process creates a dependable service handoff without slowing down your team. When every advisor and technician follows the same steps, customers receive clearer information and your shop is better positioned for the next maintenance visit.
For more guidance, see How to Use Oil Change Reminder Labels Right, review the Automotive Reminder Sticker Material Guide, or compare custom and generic oil stickers for your shop.