
A tire re-torque reminder process works only when every employee knows what to do, when to do it, and how to confirm completion.
For Canadian tire shops, the process should connect the work order, technician inspection, reminder sticker, service advisor explanation, and customer handoff. If one step is skipped, the customer may leave without clear information about when to return.
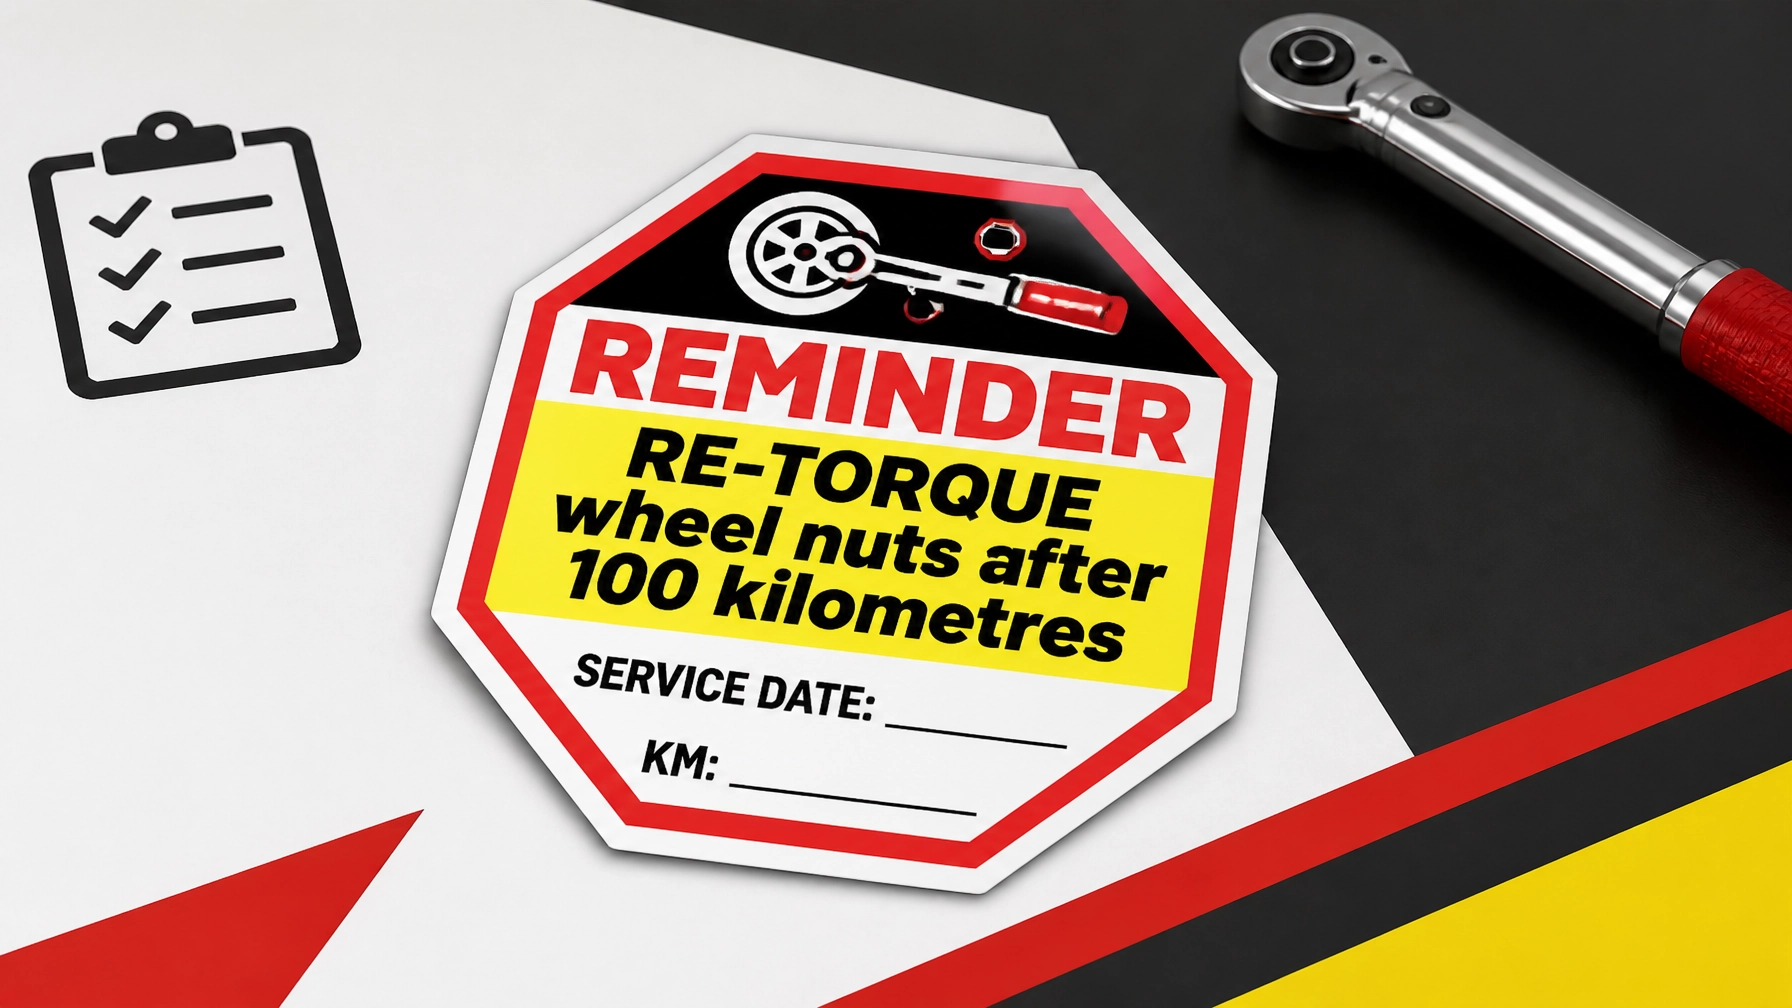
A custom reminder sticker supports the process by keeping the message visible after the vehicle leaves the shop. StickerPlanet.ca produces custom tire re-torque reminder stickers in practical formats, including the approximately 2" × 2" size commonly used for windshield applications. The stickers can include your shop branding, service message, date field, and KM information.
The sticker is a tool. Your team’s process makes the tool effective.
Start With One Clear Shop Standard
Before assigning responsibilities, decide what your shop will communicate consistently.
Many tire manufacturers and automotive service providers recommend checking wheel fasteners after an initial driving period following wheel installation. The exact interval can vary by vehicle, wheel, fastener, installation method, and manufacturer guidance. For that reason, your shop should establish a written policy based on the applicable vehicle and manufacturer requirements.
Your internal policy should define:
- The recommended re-torque interval, such as approximately 50–100 KM or another interval selected by your technical team
- Whether the follow-up inspection is included at no additional charge
- Whether customers need an appointment
- Which services require the reminder:
- Seasonal tire installation
- Wheel installation
- Tire rotation
- Tire repair involving wheel removal
- Other services involving wheel fasteners
- Who records the service information
- Who fills out and applies the reminder
- Who explains the next step to the customer
Do not use different wording from one employee to another. If the sticker says one interval and the advisor says another, the customer receives conflicting instructions.
The Five-Step Process
Use the same sequence for every applicable tire service:
- Complete the service record
- Fill in the reminder
- Verify the service date and KM information
- Apply the reminder correctly
- Confirm the customer handoff
These steps are simple, but they should be built into the repair order or digital workflow rather than left to memory.

Responsibility Chart
The following chart assigns a primary owner to each part of the process. Your shop may combine roles, but each task should still have one clearly accountable person.
| Process step | Technician | Service advisor | Front desk |
|---|---|---|---|
| Complete service record | Record the tire or wheel service, vehicle information, initial torque details, and relevant findings | Review that the work order contains the required information | Confirm the record is complete before closing the transaction |
| Fill in reminder | Complete the sticker’s service date and KM fields, or provide the information for completion | Check that the written information is legible and matches the work order | Keep the correct sticker stock available at the counter |
| Verify date and KM | Provide accurate service information from the vehicle and work order | Verify the date and KM before the vehicle is released | Check that the reminder has not been missed during checkout |
| Apply reminder | Apply it if this is part of the technician’s bay procedure | Confirm placement before handoff | Replace or correct a reminder if it is missing or unreadable |
| Customer explanation | Report technical findings to the advisor | Explain when and how the customer should return | Repeat the instruction when handling a follow-up visit |
| Handoff confirmation | Mark the technical step complete | Confirm the customer received the instruction | Record the completed handoff or route the return visit |
One person can perform multiple roles. The responsibility should never be unassigned.
Step 1: The Technician Completes the Service Record
The technician begins the process by documenting the work performed.
The service record should include:
- Vehicle identification
- Service date
- Odometer reading in KM
- Type of tire or wheel service completed
- Initial wheel torque confirmation
- Torque specification used, according to the applicable vehicle requirements
- Any damaged, unusual, or non-standard components
- Notes requiring the service advisor’s attention
The technician should use the correct tools and procedure for the vehicle. A torque wrench, correct socket, correct tightening sequence, and clean mating surfaces are part of a controlled wheel installation process.
The work order should not simply say “tires installed.” It should give the next employee enough information to complete the reminder accurately.
A useful internal status might be:
Wheel service completed , initial torque recorded , re-torque reminder required.
That status makes the next step visible to the advisor and front desk.
Step 2: Fill In the Custom Reminder
The technician or designated service employee should complete the reminder while the service information is still available.
At minimum, fill in:
- Service date
- Current vehicle KM
- Recommended return interval or target KM, if your sticker format includes it
- Any internal identifier required by your shop
Use clear handwriting or a label printer. Avoid abbreviations that customers may not understand.
The reminder should communicate one action without unnecessary text. For example:
- RE-TORQUE WHEEL NUTS AFTER 100 KM
- RETURN FOR WHEEL RE-TORQUE
- SERVICE DATE: ______
- KM: ______
If your shop uses a different interval, the wording should match your written procedure and the applicable technical recommendation.
A custom sticker can also include:
- Your business name
- Logo
- Website
- General contact information
- Service department identification
- A clear customer instruction
Keep the main message prominent. Branding should support readability, not compete with the re-torque instruction.
Step 3: Verify the Date and KM Information
The service advisor owns the customer-facing verification step.
Before the vehicle is released, compare the sticker against the repair order:
- Does the service date match?
- Does the KM reading match the vehicle record?
- Is the recommended return information correct?
- Can the customer read the handwriting?
- Is the sticker free from smudges, folds, or missing fields?
This is a fast quality-control check. It prevents small transcription errors from following the vehicle out of the shop.
The advisor should also explain the instruction in plain language:
“Your wheel service is complete. Please return for the re-torque check at the KM interval shown on your reminder. We have recorded today’s service information here for reference.”
Avoid making unsupported guarantees. The purpose of the conversation is to explain your shop’s process clearly and tell the customer what action to take.
Step 4: Apply the Reminder Correctly
For a windshield reminder, use the inside face of the windshield. The sticker should be approximately 2" × 2", positioned in the top-left corner from the driver’s perspective, and readable from inside the cabin.
Do not place the sticker:
- On the steering wheel
- On the dashboard
- Where it blocks the driver’s view
- On a dirty, wet, waxed, or contaminated surface
- In a position that makes the text difficult to read
Before application:
- Clean the intended glass area.
- Allow the surface to dry.
- Check the sticker orientation.
- Apply it smoothly without trapping dirt or air beneath it.
- Confirm that the date and KM fields remain visible.
StickerPlanet.ca offers material options for windshield applications, including white static cling, clear static cling, clear low-tack vinyl, and white ultra-low-tack vinyl. The appropriate selection depends on your preferred holding power, removability, and visual contrast.
The product information includes:
- Approximately 8 mil static cling
- Approximately 3 mil removable low-tack vinyl
- Individually die-cut stickers
- Full-colour printing
- Eco-solvent inks
- Standard options including 2" × 2"
- Custom sizes up to the product’s available area specifications
White material is often the practical choice when the team needs strong contrast for handwritten information.

Step 5: Confirm the Customer Handoff
The handoff is not complete merely because the sticker is on the windshield.
The service advisor should:
- Point out the reminder
- State the recommended KM interval
- Explain whether the follow-up inspection is included in the shop’s policy
- Tell the customer how to arrange the return visit
- Ask whether the instruction is understood
The front desk should then confirm that the customer leaves with:
- The vehicle
- The invoice or work order
- The re-torque instruction
- A visible and legible reminder
- Any appointment or follow-up information required by the shop
A short handoff script keeps the wording consistent:
“The reminder is applied inside the windshield in the driver’s top-left viewing area. Please follow the KM instruction shown and contact us or return according to our service policy.”
This is direct, professional, and easy for every employee to repeat.
Build a Front Desk Checkpoint
The front desk should have a final checklist before closing the transaction.
Checkout checklist
- Tire or wheel service is listed on the work order
- Initial torque information is recorded
- Service date is confirmed
- KM information is confirmed
- Reminder is filled in completely
- Reminder is applied in the correct windshield position
- Customer received the re-torque instruction
- Follow-up visit or reminder is logged when required
For return visits, the front desk should ask:
- “Did you have your wheels or tires serviced recently?”
- “Approximately how many KM have you driven since the service?”
- “Is this a return visit for the re-torque check?”
Create a no-charge follow-up work order if that is part of your shop policy. Record the return visit so the customer file shows that the process was completed.
Use the Right Custom Sticker for Your Workflow
A custom tire re-torque reminder should fit your team’s actual working conditions. StickerPlanet.ca can help create a design with:
- High-contrast red, white, black, and yellow graphics
- A prominent re-torque instruction
- Service date and KM fields
- Shop branding
- Clean, readable typography
- A format suited to interior windshield placement
StickerPlanet.ca also provides no-cost benefits, including no artwork setup charge, no rush order charge in the stated service situations, no additional colour charge for full-colour printing, and no hidden costs. Orders are produced in Canada using premium North American materials, with tracked shipping available to Canadian addresses.
See the Custom Tire Re-Torque Reminder Service Stickers product page for material, size, orientation, and ordering options. You can also review the Automotive Reminder Sticker Material Guide before selecting the right stock.
Review the Process With Your Team
Once the process is written, train every role using the same one-page checklist.
Review:
- Who fills out the sticker
- Who checks the date and KM
- Who applies it
- Where it goes
- What the advisor says
- What the front desk records
- What happens when the sticker is missing or incorrect
Then audit a small sample of completed work orders each week. Look for missing fields, inconsistent wording, incorrect placement, and incomplete handoffs.
A reliable re-torque reminder process is not complicated. It is a short chain of repeatable actions:
Record the service. Fill in the reminder. Verify the information. Apply it correctly. Confirm the handoff.
When every employee follows the same sequence, your shop provides clearer customer communication and a more consistent service experience.